Post-Production
Edit-to-Sound Delivery Instructions
· 5 min read · Federico Casazza
To ensure a correct delivery, these are the delivery specs I ask every editor to follow before handoff.
1. Audio Export (AAF)
Export the audio as an AAF with embedded media at 48kHz / 24-bit, and give every clip 10 seconds of handles so there's room to work with fades and trims without hitting a clip boundary. The session frame rate has to match the video reference exactly — 23.976, 25, 29.97, whatever the project was shot and cut at; a mismatch here is one of the most common causes of sync drift. Don't include video in the AAF itself — that's handled separately by the video reference below.
2. Video Reference
Send a video reference alongside the AAF. DNxHD (1080p 36, 8-bit) is the primary codec I ask for, with Apple ProRes 422 Proxy as a fallback if that isn't available on your system. The timecode burn-in (BITC) needs to be visible, and the reference should include the guide sound. Keep the file size reasonable — this is a sync and picture reference, not a delivery master, so 4K resolution isn't necessary.
3. Sync & Timecode
Every session should start at 01:00:00:00. Keeping this consistent across every deliverable is what keeps sync reliable and avoids the guesswork that comes from mismatched start timecodes between picture and sound.
4. Timeline Organization
This is the part that determines how quickly I can actually start mixing, so it's worth the extra few minutes before you export. Keep audio on its assigned track:
- Track 1 — Boom
- Track 2 — Lav 1
- Track 3 — Lav 2 (add Lav 3, Lav 4, and so on for additional characters)
- Track 4 — Sync/PFX (camera SFX)
- Track 5 onward — SFX, one category per track, never mixed together
- Next tracks — Ambience
- Next tracks — Music
Before exporting, clean up the session: remove every muted or disabled clip, and delete any track that's empty or unused. Keep the original recorder file names on every clip — A6-0006, A11-0002_Lightning strike, and so on. Don't rename or bounce clips to generic names; everything needs to trace back to the source recording. Leave clip gain and pan automation exactly as it is in the export — don't flatten or print it into the audio before sending it over.
The goal throughout is consistency: each element stays on its designated track, with no channel-hopping — boom stays on a single track, and nothing gets scattered across random or empty ones. Label every track clearly, and keep dialogue, SFX, and ambience strictly categorized.
Sessions that don't follow this structure will be sent back for reorganization before work begins.
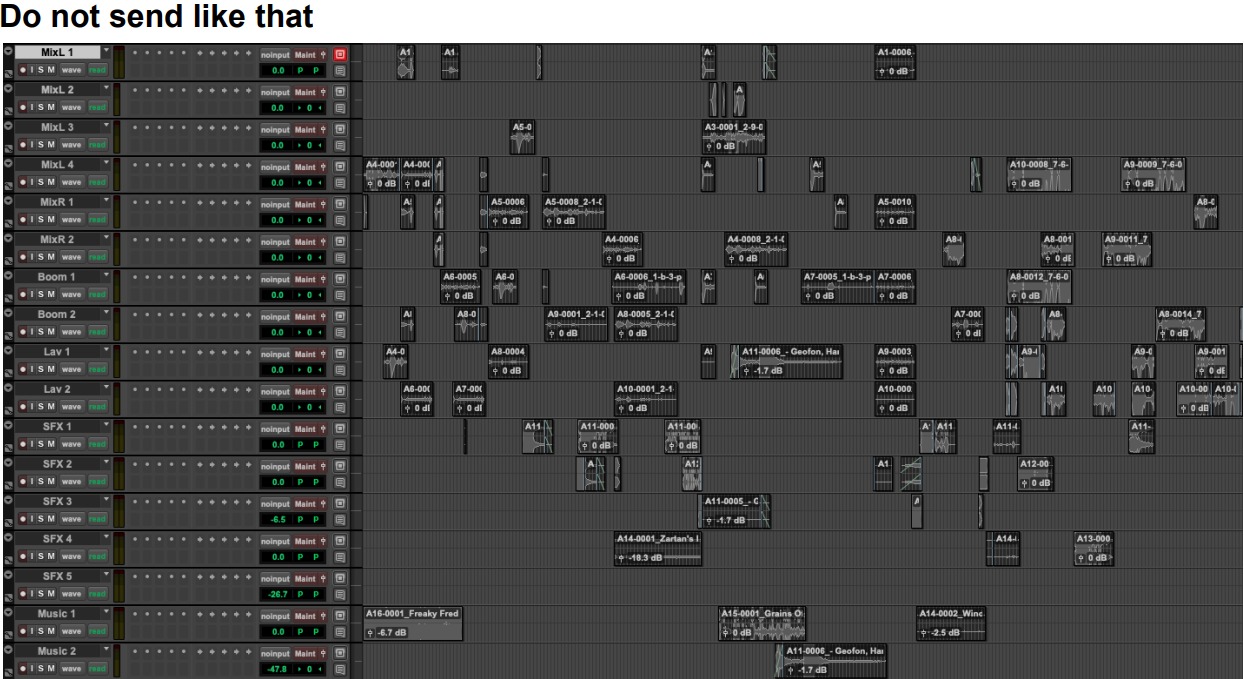
Do not send like that
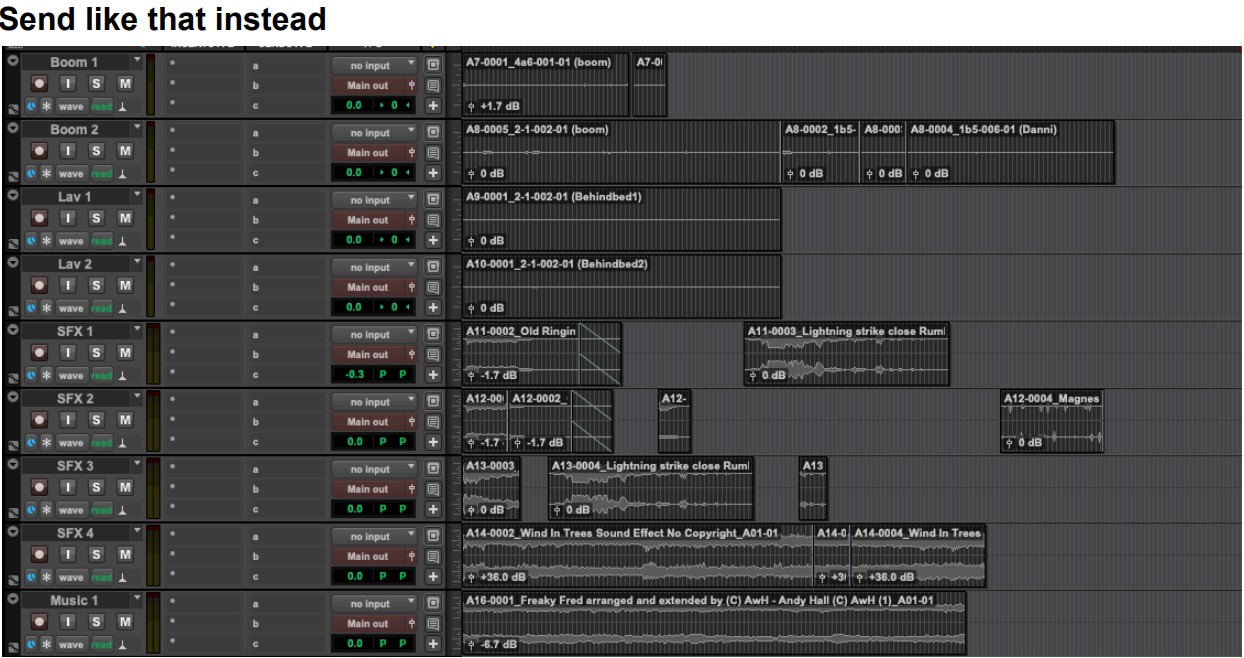
Send like that instead
5. File Delivery
- Shared Drive upload folder (link pending)
- Uschovna, free unlimited Czech platform
- SwissTransfer, up to 50GB transfer
Need help preparing your AAF? Check the guide for your program:
There are also many YouTube tutorials covering correct AAF export for each video program.
Prefer a printable copy for your team?
Download the PDF ↓